Physical Address
304 North Cardinal St.
Dorchester Center, MA 02124
Get expert composite decking installation tips to ensure a flawless deck build. Learn proper techniques, avoid common mistakes, and maximize durability.
Ever dreamed of the perfect outdoor space in your backyard? But felt lost on where to start with composite decking?
I’ve been there too! Over ten years, I’ve built dozens of decks. I made every mistake possible. But you don’t have to.
This comprehensive guide has all I wish I knew before starting. It’s for anyone, whether you’re a DIY newbie or a pro contractor. I’ll guide you through every step.
Good installation isn’t just about following steps. It’s about knowing why you’re doing each thing. I’ll share my stories, tricks, and advice for top-notch results.
In this composite decking installation guide, you’ll learn to avoid common mistakes. You’ll build a deck that lasts for years. So, grab a drink, relax, and let’s start building your dream deck! 🎉
I once stood in a building supply store, feeling overwhelmed by the composite decking options. Each board looked similar, but the prices were different. I learned that understanding composite decking materials is key before starting your project.
The material you choose affects your installation, budget, and deck’s performance. Choosing the right material is the first step in installing composite decking. I’ll guide you through what you need to know to avoid feeling lost.
Composite decking isn’t a one-size-fits-all product. There are three main types on the market, each with its own characteristics. These impact both installation and long-term performance.
Capped polymer composite is at the high end. It has a protective polymer shell around the core. I recommend these for families with kids and pets because they resist stains, scratches, and fading well.
These boards are heavier and need specific fastening to keep the protective shell intact. Spilled wine or dropped burgers won’t leave permanent marks (I’ve tested this at many barbecues).
Uncapped polymer composite is a more affordable option without the protective shell. These boards are exposed to the elements. They still outperform wood but need more maintenance.
I suggest these for covered decks or for those who don’t mind cleaning them occasionally. The installation is similar, but be extra careful about cut edges and drilling points.
Wood-plastic composite (WPC) mixes recycled wood fibers with plastic. It’s a middle ground. I chose this for my deck because it has a wood grain texture and feels natural underfoot.
The blend ratio affects flexibility and color consistency. WPC expands and contracts more than pure polymer, so spacing is critical.
Composite materials have many benefits, beyond just being low maintenance. Here are the top advantages.
Weather and pest resistance is a big plus. Composite materials won’t rot, warp, or attract termites. I’ve installed decks in humid and desert climates, and they perform well in both.
They’re made to withstand temperature swings, heavy rain, and UV exposure without staining or sealing. This saves you time and money every year!
Material properties affect installation techniques. Best practices for installing composite decking require understanding thermal expansion rates, proper fastener selection, and appropriate board spacing – all determined by your material choice.
I advise clients to research materials thoroughly. This decision impacts everything downstream. Consider your local climate, sun exposure, and deck usage. A shaded deck in Seattle needs different material considerations than a sun-drenched patio in Phoenix.
Modern composite options come with detailed installation specifications. These aren’t suggestions – they’re requirements for maintaining warranties and ensuring your deck performs as promised. I’ve seen beautiful decks fail prematurely because installers didn’t follow material-specific guidelines.
Temperature extremes are crucial when selecting materials. Some composites become more flexible in heat, while others maintain rigidity. If you’re building near water or in humid areas, moisture resistance ratings are key. Matching material properties with your environment ensures installation success and decades of enjoyment!
Let’s talk tools—because having the right equipment isn’t just about making the job easier, it’s about doing it RIGHT! I learned this lesson the hard way during my second deck installation when I tried to cut corners (pun intended 😄) by using inadequate tools. Big mistake!
The truth is, your tool collection directly impacts the quality of your finished deck. Cheap or improper tools lead to ragged cuts, stripped screws, and a whole lot of frustration. Trust me, I’ve been there, and it’s not worth the headache.
Before you start your project, take time to gather everything you need. Having all your equipment ready saves countless trips to the hardware store and keeps your installation moving smoothly.
When it comes to recommended tools for installing composite decking, quality matters more than quantity. You don’t need a massive collection, but what you do have should be reliable and appropriate for the job.
Here’s what I consider absolutely essential for any composite deck installation:
Beyond the basics, some additional recommended tools for installing composite decking make the job significantly easier. A miter saw is fantastic for angled cuts and produces incredibly clean edges. If you’re using hidden fasteners, you’ll need the manufacturer-specific installation tool.
Here’s my pro tip: invest in a composite-specific saw blade. These specialized blades reduce both chipping and melting, which standard wood blades can cause. The difference in cut quality is immediately noticeable.
A jigsaw with a fine-tooth blade is invaluable for curved cuts around posts and obstacles. I didn’t appreciate this tool until I had to cut around a dozen support posts—then it became my best friend!
Don’t forget about smaller items that make life easier: a pencil or marking pen, a combination square for checking angles, and clamps for holding boards steady while you work. These little helpers prevent mistakes and improve accuracy.
Please don’t skip this part—I’ve seen too many preventable injuries over the years. Your safety gear is just as important as your power tools, maybe even more so.
Here’s what you absolutely need to protect yourself:
Beyond the standard safety gear, think about sun protection. Deck installations take time, and sun exposure adds up quickly. I always wear a good hat and apply sunscreen regularly throughout the day.
Keep a well-stocked first aid kit nearby at all times. Include bandages, antiseptic, pain relievers, and blister treatments. Minor cuts and scrapes happen, and you want to address them immediately.
Stay hydrated! Keep water or sports drinks within reach and take regular breaks. Working in the sun while focusing on precise measurements is physically demanding. Never work when you’re fatigued—that’s when accidents happen.
Here’s something I learned from experience: organize your work area to minimize trip hazards. Keep power cords secured, tools in designated spots, and the workspace clear of debris. A clean site is a safe site.
Your safety is worth way more than finishing a day early. Take your time, use proper equipment, and never take shortcuts with protective gear. The few extra minutes spent on safety precautions can prevent injuries that last a lifetime.
I’ve seen many deck projects fail because of poor prep work. The essential steps for successful composite decking installation start with this critical phase. Spending hours here can save you days of trouble later!
Site prep is like the foundation of your project. You wouldn’t build a house on shaky ground, right? The same goes for your composite deck. Every measurement, every cleared inch, every verification check helps your deck look great and last long.
I learned a hard lesson on my second deck project. I rushed the prep work, thinking I could start installing boards fast. This cost me three extra days and a lot of stress. Don’t make the same mistake! 😅
Accurate measuring is key to a professional-looking deck. I use the 3-4-5 triangle method for my layout. This ensures my corners are square, which is crucial.
Here’s how I measure systematically. First, I measure the deck’s dimensions. Then, I double-check to catch any mistakes. And yes, I measure a third time to avoid errors in the frame.
After I’m sure of my measurements, I mark everything clearly. I use stakes and mason’s string to outline my deck. This lets me see where my deck will go and make adjustments before building.
Here are the key steps for measuring and marking:
I also take photos from different angles at this stage. These images help me remember my layout and make great “before” shots for my project portfolio!
Now comes the physical work that many DIYers try to skip. Don’t skip this step! Properly clearing your space prevents weed growth, drainage issues, and structural instability.
I start by removing all grass, plants, and organic material within the deck footprint. But here’s the pro tip: clear the area 12 inches beyond your deck perimeter. This extra space helps you work without vegetation creeping under your deck edges.
Next, I excavate the area to a depth of 3-4 inches. This might seem excessive, but it allows for proper drainage and laying landscape fabric. That fabric acts as a barrier against weeds, and future you will absolutely thank present you for this foresight! 🙌
Grading the area correctly is key for water management. I always slope the ground away from my house at about 1/4 inch per foot. This ensures rainwater flows away from your foundation rather than pooling under your deck.
Here’s my systematic approach to clearing the installation site:
If you’re dealing with uneven terrain, plan your post heights and beam configurations now. I like to use a laser level for this (you can rent one affordably if you don’t own one). It shows me exactly how much variation exists across my site.
The prep phase might feel slow when you’re eager to start building. But these essential steps for successful composite decking installation create a solid foundation. I’ve built decks both ways – rushing through prep and doing it properly. The difference in final results is huge!
Take your time here. Do the work right. Your future self will thank you when installation goes smoothly and your finished deck stands strong for years to come. 🔨
Let’s dive into building the deck frame. It’s the backbone of your deck, and I’ve learned that shortcuts here lead to trouble. These expert tips for composite decking installation will guide you in creating a sturdy frame, tailored for composite materials.
Many builders don’t know that composite decking has special needs. The frame must handle the unique ways composite materials expand and contract. I’ll share methods that have worked well for me on many decks.
Your frame design should fit your deck’s needs. For ground-level decks, a simple perimeter frame with joists works best. It’s stable and easy to build.
Elevated decks need a more complex setup with posts, beams, and proper load distribution. You’ll need to think about vertical support, lateral bracing, and often need building permits. The deck’s height affects the frame’s complexity.
One key expert tip for composite decking installation is joist spacing. Composite decking needs closer spacing than wood:
Using 12-inch spacing is crucial because composite materials flex differently than wood. I learned this the hard way on my second deck project when I used 16-inch spacing with standard boards and noticed excessive bounce between joists.
For framing lumber, I always choose pressure-treated wood for its durability and cost. But, here’s a pro tip: use composite or PVC trim boards where the frame is visible. These materials match your decking perfectly and keep their appearance without weathering like pressure-treated lumber.
The frame design should also ensure proper drainage and airflow underneath your deck. I always make sure there’s enough clearance between the ground and joists (minimum 12 inches for ventilation). This prevents moisture buildup that can cause mold and structural issues.
Installing joists and beams requires precision and attention to structural principles. If your deck attaches to your house, start by securing the ledger board properly. Use lag screws driven into the rim joist, not just the siding material!
I once had to remove an entire ledger board because I’d fastened it incorrectly. 😅 That experience taught me to always attach through to solid structural members. The ledger board carries significant load, so proper installation is critical.
Here’s my step-by-step process for installing beams and joists using expert tips for composite decking installation:
The hardware you choose is crucial for longevity. I use only galvanized or stainless steel fasteners and hangers to prevent corrosion. Standard steel hardware will rust and fail prematurely, which is a problem in humid climates or coastal areas.
Joist hangers provide superior connection strength compared to toe-nailing. They distribute load more evenly and prevent joists from twisting or pulling away from beams over time. Every single joist should be secured with properly sized hangers—this isn’t an area to save money.
For longer joist runs (anything over 8 feet), I add blocking between joists at mid-span. This prevents the joists from twisting and adds rigidity to the entire frame structure. I typically use the same dimensional lumber as the joists, cut to fit snugly between them.
Here are the critical hardware specifications I follow:
Checking for level is something I do obsessively during frame installation. Every beam, every joist, every blocking piece gets checked with my 4-foot level. A frame that’s out of level by even a quarter inch will cause noticeable problems when you start installing composite boards.
One of my favorite expert tips for composite decking installation involves creating a reference line across all joists. After installing and leveling all joists, I snap a chalk line across the tops to mark where the decking will end. This ensures perfectly aligned board ends and makes installation much easier.
Don’t rush the framing phase! This solid foundation is what makes your composite deck feel stable and professional for decades. I typically spend about 60% of my total installation time on framing because getting it right eliminates problems later. A properly built frame should feel rock-solid when you walk on it—no flex, no bounce, just stable support ready for your composite boards.
I learned a hard lesson about cutting composite decking the first time. Using the wrong blade made the edges melt, costing me a lot. This taught me that cutting composite decking is key to installing it like a pro. It’s different from cutting wood, so you need the right tools and technique.
Once you know the right way, cutting composite boards is easy. You’ll get professional-looking results every time.
I’ve tried many cutting tools and found the best ones for the job. The right tools are crucial for quality cuts and a great-looking deck.
A circular saw with a 60-tooth carbide blade is my top choice for cutting composite decking. The high tooth count prevents chipping and gives you clean edges. Always use blades made for composite materials, not regular wood blades.
Keeping your blades sharp is important. A dull blade can make cuts look bad and even melt the material. Yes, it can melt!
For different cutting jobs, I use these tools:
Composite dust is different from sawdust. It’s finer and stickier, so it spreads everywhere. I cut in a separate area to keep things clean and prevent dust from getting on the boards.
Having the right tools is just the start. How you use them makes all the difference. Here are some techniques that have helped me.
Always cut with the finished side facing up when using a circular saw. This helps avoid chipping on the surface. For miter saws, the finished side should face up too. This simple trick makes a big difference.
Being accurate with your measurements is key. I measure carefully and mark my cut line with a pencil or chalk. Always measure twice, mark once, and check before cutting. This saves you from mistakes.
I use a speed square clamped to the board for straight cuts. This trick has saved me from many crooked cuts. For longer cuts, use a straight edge as a guide. It keeps your saw on track.
Let the saw do the work. Don’t force it through the material! Cutting too fast can melt the edges and make them uneven. A steady pace gives you clean cuts every time.
Here’s a pro tip: cut your boards about 1/8 inch longer than needed, then trim them. This gives you room for adjustments during installation and ensures tighter fits.
Always support both sides of your cut line. If a board sags or binds, it can cause kickback or uneven cuts. I use sawhorses or a temporary work surface to support the board.
Safety is always first. I wear safety glasses and a dust mask during cutting. The fine composite dust can irritate your lungs and eyes, so protection is essential.
When cutting multiple boards to the same length, do them all at once or in succession. This saves time and ensures consistency. I also label my cut boards with their intended location using painter’s tape. This helps avoid confusion during installation.
Pay attention to wood grain patterns and color variation in your composite boards. Cutting with awareness of these visual elements helps create a cohesive, professional look across your deck.
Take your time with every cut. Rushing leads to mistakes, which means wasted materials and extra costs. A precise cut means no gaps, better aesthetics, and a professional installation that you’ll be proud of every time you step on your deck!
It’s time to install the composite decking boards and bring your vision to life! This stage turns all the structural work into a beautiful outdoor space. I love this part because you can see your hard work paying off with every board you lay.
Here are some top tricks for easy composite decking installation. Understanding your fastening options and getting your spacing right is key. These factors will make your deck look professionally installed or like a DIY project gone wrong.
Start by placing your first board against the house or starting edge. Make sure it’s perfectly straight because this board sets the alignment for your entire deck. I use a chalk line to mark my starting point and double-check it with a level. This initial board is your foundation, so take your time getting it right.
When securing your decking boards, you have two main fastening methods to choose from. Each method has its own advantages, depending on your budget, aesthetic preferences, and installation experience.
Face screwing is the more straightforward approach. You drive composite-specific screws directly through the board face into the joists below. This method is budget-friendly and faster to complete. Always pre-drill your holes!
Without pre-drilling, the screws can cause mushrooming around the screw heads. This creates unsightly raised areas that collect water and look unprofessional. Use color-matched screws and position them about 3/4 inch from the board edge. Drive them slightly countersunk so they’re flush but not over-driven.
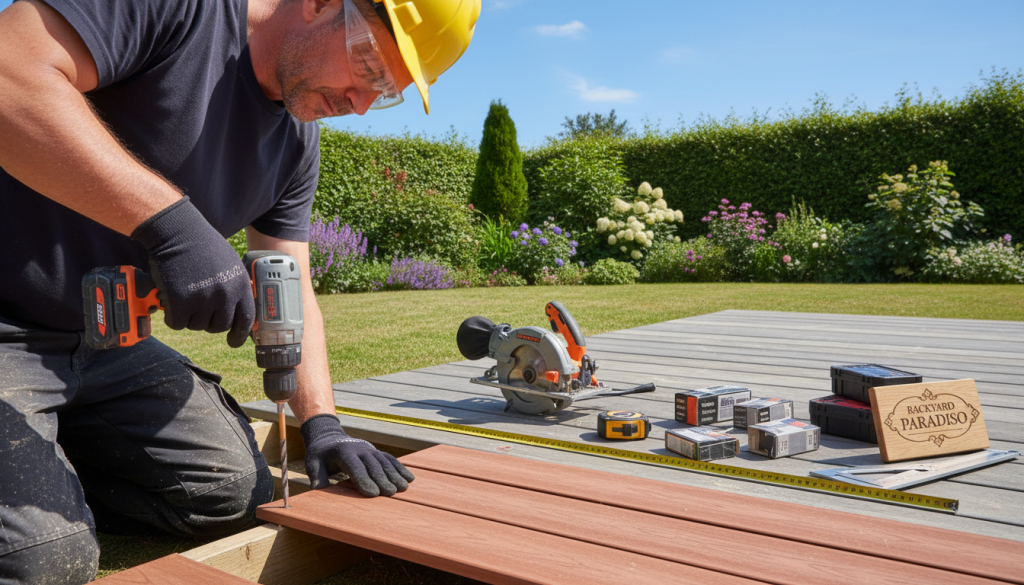
Hidden fastener systems are my personal preference for most composite decking installation projects. These systems use clips that attach to the board edges and secure directly to the joists. The result is a seamless, screw-free surface that looks incredibly professional.
Major manufacturers like Trex, TimberTech, and Fiberon each have proprietary hidden fasteners designed for their products. Follow their installation instructions carefully because each system works slightly differently. Yes, the installation takes longer initially, but the results are absolutely worth the extra effort! 🎯
Here’s a practical tip: I typically face-screw my starter board since it’ll be hidden by fascia or trim anyway. This gives me a solid, stable foundation without worrying about hidden fastener alignment on that critical first board.
Proper board spacing techniques are absolutely critical with composite materials. Unlike traditional wood decking, composite boards expand and contract significantly with temperature changes. Ignore this fact, and you’ll have buckling boards or gaps you could lose your car keys through!
Most manufacturers recommend 1/4 inch spacing between board ends and 1/8 inch spacing between board sides. Always check your specific product guidelines because recommendations vary by brand and material composition. I keep the installation manual handy and reference it frequently.
Temperature plays a huge role in thermal expansion. I recommend installing your deck during moderate temperatures (60-80°F if possible) because the boards are at their median expansion state. If you must install during extreme weather, adjust your spacing – tighter in hot weather, wider in cold.
Invest in spacing tools or make them from scrap material. Consistency is absolutely key for professional-looking results. I use different sized spacers for end gaps versus side gaps to maintain proper spacing throughout the installation.
Work systematically across the deck, checking alignment every 4-5 boards. Your boards should run perpendicular to the joists unless you’re creating a diagonal or herringbone pattern. Use a straightedge or chalk line to verify alignment regularly – small corrections along the way prevent big problems later.
Stagger your end joints by at least 12 inches between rows. Never line up end joints in adjacent rows because this creates structural weak points and looks unprofessional. I plan my board layout before installation to minimize waste and achieve proper staggering.
Here are my essential board spacing tips:
When you’re within a few boards of finishing, measure carefully to ensure your final boards fit properly. Sometimes you’ll need to rip-cut the last board to width, which is completely normal. Plan ahead so you don’t end up with an awkwardly narrow final board (anything less than 2 inches wide looks terrible and can be difficult to fasten properly).
One more golden tip from years of experience: handle boards carefully during installation. Composite materials can scratch and scuff, and these marks are difficult to remove. I wear clean gloves and use clean work surfaces to protect that beautiful finish. A little extra care during installation saves hours of frustration trying to buff out scratches later!
Let’s explore how creative layouts can elevate your composite deck from functional to phenomenal! This is honestly one of my favorite parts of any deck project because it’s where your personality really shines through. The pattern you choose can completely transform the visual impact of your outdoor space.
While the standard perpendicular board layout works beautifully and never goes out of style, experimenting with different patterns opens up a world of design possibilities. I’ve installed dozens of decks over the years, and the ones that get the most compliments are always those with thoughtful, creative patterns.
These composite decking installation tips will help you move beyond basic layouts and create something truly special. Trust me, the extra planning is absolutely worth it when you see the finished result! 😊
Diagonal patterns rank among the most popular choices for good reason. Installing boards at a 45-degree angle creates dynamic visual interest that draws the eye across your deck. I used this technique on my own backyard deck, and it genuinely makes the space feel larger than it actually is.
The angled lines create movement and energy that perpendicular boards simply can’t match. One of the best composite decking installation tips I can share is that diagonal layouts work exceptionally well for smaller decks where you want to maximize perceived space.
Herringbone patterns deliver sophistication and elegance like nothing else. This classic design features boards installed at opposing 45-degree angles that meet in a V-shape. The result is absolutely stunning, but I’ll be honest with you—it’s also the most challenging pattern to execute.
Herringbone requires meticulous planning and precise cuts. You’ll also need to budget for 15-20% more material due to increased waste from all those angled cuts. Despite the complexity, this pattern creates a high-end look that significantly boosts your deck’s visual appeal.
Picture frame borders are another favorite technique of mine. This design features boards running around the deck’s perimeter in a different direction than the field boards. The border creates a defined edge that gives your deck a polished, finished appearance.
I’ve found that picture frame borders work beautifully with any field pattern—whether perpendicular, diagonal, or even herringbone. These composite decking installation tips include using contrasting colors for the border to really make it pop!
Color and texture mixing opens up even more creative possibilities. Many composite decking manufacturers offer multiple colors and finishes within the same product line. You can incorporate these variations to create distinct zones, pathways, or geometric designs.
I once designed a deck that used three different board colors to create a chevron pattern—the homeowners still send me photos years later! The key is ensuring all materials come from the same product family so installation requirements remain consistent.
The most important composite decking installation tips for creative patterns start with thorough planning. Always draw your pattern to scale on paper before cutting a single board. This simple step helps you visualize the final design and calculate material quantities accurately.
I use graph paper for this process, with each square representing a specific measurement. This approach has saved me from countless headaches and expensive material mistakes over the years!
Complex patterns require additional framing support that standard layouts don’t need. Your joist layout must accommodate the direction your boards will run. For diagonal installations, you’ll need joists spaced every 12 inches on center, running perpendicular to your diagonal boards.
This tighter spacing prevents flexing and ensures long-term stability. Skipping this step is one of the biggest mistakes I see DIYers make with pattern installations.
Here’s a crucial consideration: plan your starting point carefully. I typically begin from the most visible or central area of the deck and work outward. This ensures your best cuts and tightest joints appear where people naturally look first.
Starting from the wrong location can leave you with awkward board placements in prominent areas—something I learned the hard way on an early project! These composite decking installation tips come from real experience, not just theory.
When mixing colors or board widths, always lay out a test section first. Place several boards in your planned arrangement to ensure you’re happy with the combination before committing to the entire deck. What looks great in your mind doesn’t always translate perfectly in reality.
Consider how your pattern interacts with other deck features like railings, stairs, built-in planters, or seating areas. The pattern should enhance these elements rather than compete with them. I always sketch these features into my pattern drawings to visualize the complete picture.
Complex patterns genuinely require more time and precision than standard layouts. Allow yourself extra time for cutting and fitting, specially if this is your first attempt at creative patterns. Rushing through intricate designs leads to mistakes that are difficult or impossible to correct later.
Don’t be afraid to get creative, but also be honest about your skill level! Some patterns are genuinely advanced and might benefit from professional execution. There’s absolutely no shame in recognizing when expert help makes sense—it often saves money in the long run by avoiding costly errors.
If you’re feeling overwhelmed by pattern options or concerned about execution, we’re here to help! Sometimes a professional eye can bring your vision to life while avoiding expensive mistakes. Contact us for a free consultation at https://backyardparadiso.com/contact-us/ and let’s discuss how to make your dream deck a reality.
These composite decking installation tips for patterns and layouts give you the foundation to create something truly unique. With proper planning and attention to detail, your deck will become a stunning focal point that reflects your personal style and enhances your outdoor living experience for years to come! 🎨
I’ve seen many beautiful decks ruined in just a few years. It’s because homeowners forgot about drainage and ventilation. These are absolutely essential for your deck to last long. Water and trapped air are the biggest enemies of composite decks.
Following best practices for installing composite decking means focusing on water management from the start. Even though composite materials resist rot better than wood, standing water still causes problems.
Water will destroy your deck if it can’t escape. I’ve seen gorgeous composite decks develop mold, mildew, and structural issues in just three years. The main cause? Poor drainage planning.
Standing water leads to mold and mildew growth, making your deck look bad and unhealthy. It also makes the surface slippery, which is dangerous. In winter, it can freeze into ice patches that are accident hazards.
Here’s what I do on every installation to ensure proper water drainage:
One trick I learned from a drainage specialist changed my approach completely. For decks in areas with heavy rainfall, I install simple solutions beneath the deck structure. A gravel bed or strategically placed drain pipes manage runoff and prevent water accumulation near your foundation.
The spacing between your composite boards serves double duty. Yes, it allows for thermal expansion and contraction. But it’s equally important for letting water drain through rather than sitting on the surface where it causes problems.
Ventilation is the unsung hero of deck longevity. Proper airflow beneath and around your deck prevents moisture buildup, stops mold growth before it starts, and keeps pests from making your deck their home. Following best practices for installing composite decking means treating ventilation with the same importance as the visible components.
I always maintain at least 18 inches of clearance between ground level and the deck surface. This spacing provides adequate airflow and makes future maintenance and inspections so much easier (you’ll thank me later when you need to check that framing!).
Here’s something critical many DIYers get wrong: they enclose their deck sides completely for aesthetics without considering airflow. Trapped air beneath a deck creates the perfect environment for moisture problems. I get it – enclosed skirting looks cleaner and more finished.
If you want skirting (and honestly, it does look great), install vented skirting panels. These allow necessary airflow while keeping critters out and maintaining that polished appearance.
Key ventilation strategies I use on every project include:
I learned this lesson from a moisture remediation specialist who fixed a deck disaster: irregular spacing creates pockets where moisture accumulates. Some areas dry quickly while others stay damp, creating perfect conditions for mold growth. Consistency is key!
Sometimes I install additional blocking or framing to ensure air can flow freely around obstacles. It’s extra work during installation, but it prevents expensive problems later.
Make drainage and ventilation inspection part of your seasonal maintenance routine. Check these systems at least twice yearly – once after winter and again after your wettest season. Look for debris blocking drainage gaps, vegetation encroaching on ventilation spaces, or any signs of moisture accumulation.
In humid climates like the Southeast, ventilation becomes even more critical. I’ve worked on coastal properties where I doubled standard ventilation openings because the moisture load is simply higher. Your environment dictates your approach, so consider local climate conditions when planning your system.
The finishing touches make a deck go from basic to amazing. These final steps add safety, function, and style. They turn your deck into a space that shows off your taste.
This part of the project is my favorite. You’ve built the deck’s structure. Now, you get to add the details that make it special. 🌟
Railings are key for safety and design. They’re required for decks over 30 inches high. I’ve worked with wood and glass, each adding its own look.
Here are my expert tips for composite decking installation for railings. The right material affects look and upkeep.

Installing railings needs care and precision. Posts must be securely attached to the deck frame, not just the decking. This is crucial for safety and strength!
I always add blocking under the deck for posts. This boosts strength and prevents wobbling. Posts should be no more than 6 feet apart, as most codes say.
Assembling rail sections before installing saves time and ensures uniformity. Double-check measurements and spacing before starting. Always use a level to ensure railings are straight and even.
For a unique look, mix materials. Cable rails and glass panels add modern touches and enhance views. The goal is to create contrast that complements your design.
Lighting turns your deck into a evening oasis. It extends your deck’s use into the night. The right lights create a cozy atmosphere without being too bright.
Here are some lighting options to consider:
LED lights are a smart choice. They save energy, last long, and don’t get hot. Solar lights are great for areas without power, but might not be as bright.
Plan your lighting layout to avoid dark spots and the stadium effect. You want a comfortable, relaxed feel. I aim for layered lighting – ambient, task, and accent lights.
Accessories make your deck personal and functional. Think about how you’ll use it. Do you need a grilling area, seating, or a play zone?
Popular accessories include:
My pro tip: Add backing or blocking during framing for future accessories. It’s easier to do now than later!
Fascia boards are often overlooked but greatly improve appearance. They cover the deck’s edges, creating a clean, polished look. I use the same material as the decking for a consistent look.
For corners, mitered cuts are the cleanest look. If you’re not sure about mitering, corner trim is a good alternative. Adding skirting under the deck is also a good idea, but make sure it’s ventilated.
If your deck has complex features like levels, hot tubs, or lots of electrical work, get professionals involved. It’s wise to know when you need expert help.
If you’re unsure about finishing touches or need help with accessories and lighting, contact us for a free consultation. A professional can help you make the most of your deck and exceed your expectations. 💡
Your new deck is a beauty and deserves care to last for decades. Composite materials need less upkeep than wood but still require regular checks. This ensures they perform at their best.
Keep your deck clean by sweeping it weekly. This removes leaves, dirt, and debris that can stain. I clean mine twice a year with a mild soap and a soft-bristle brush.
Use a garden hose or a pressure washer on the lowest setting. High pressure can damage the deck’s surface. Avoid harsh chemicals and bleach, as they can harm the protective cap layer.
For mold or mildew in humid areas, use a composite deck cleaner with mildewcide. Clean spills quickly, like wine or fruit juice, to prevent stains.
Use protective pads under furniture legs to avoid scratches. Move furniture often to ensure even aging without sun tan lines.
Start troubleshooting by regularly inspecting your deck. Check for loose fasteners, warping, or drainage issues seasonally.
Minor scratches might heal with gentle heat (test first). Warping often means bad fastening or spacing. Add more fasteners or adjust spacing if needed.
Squeaking sounds mean loose connections. Tighten fasteners and add blocking for better support. Seal cut board ends with composite end-grain sealer to prevent moisture.
Keep maintenance records and installation documents for warranty purposes. Most composite products come with 25-year warranties. Catching issues early saves money and extends your deck’s life.
