Physical Address
304 North Cardinal St.
Dorchester Center, MA 02124

Imagine transforming your outdoor space into a warm, inviting retreat. A central gathering spot in your backyard can turn ordinary evenings into memorable ones with friends and family.
Creating this backyard oasis requires careful planning. You want your new feature to be beautiful, secure, and built to last for years. Proper preparation helps you avoid common mistakes.
Whether you dream of a classic wood-burning model or a convenient gas option, understanding the basic requirements is key. Our expert tips will help you navigate the entire process, from your initial design to the final, satisfying spark.
Before you pick up a single tool, take time to envision how you’ll use your new outdoor feature. This initial planning stage is crucial for a smooth process.
It helps you make informed choices and avoid surprises later on. Think of it as the blueprint for your cozy backyard centerpiece.
Start by asking yourself how this area will function. Will it be for lively gatherings, quiet relaxation, or maybe outdoor cooking?
Your answer guides your design and fuel choice. A gas model offers instant light and easy control. A traditional wood-burning one provides classic crackles and aroma.
Your dream must align with reality, especially local rules. Research your area’s safety codes and any homeowner association restrictions first.
For example, Hearth Products Controls states no more than two sides of your feature should touch a solid structure. This prevents heat buildup.
Always check with your building department about permit needs. This upfront work is the foundation of a secure and lasting setup.
| Consideration | Details | Action Item |
|---|---|---|
| Intended Use | Entertaining, relaxing, or cooking | Define the primary function for your space. |
| Fuel Type Selection | Wood-burning for tradition or gas for convenience | Choose based on your lifestyle and desired ambiance. |
| Local Regulations | Setback distances, permit requirements, HOA rules | Contact your local building department for specifics. |
| Manufacturer Guidelines | Clearance from combustibles and structures | Follow all instructions, like the two-side rule from Hearth Products Controls. |
The blueprint for your backyard haven starts with smart design and careful layout. This is where your vision becomes a practical plan for your new gathering spot.
Thoughtful planning ensures your project fits your space beautifully and functions perfectly for years.
First, consider the scale of your available area. Your feature should allow for comfortable seating and easy movement around it.
A circular design encourages conversation, while a square shape might suit a modern patio. Think about how many people you typically host.
The Outdoor GreatRoom Company suggests that for screened-in areas, you must ensure a minimum porch area of at least 96 square feet for safety.
Where you locate your fire pit is crucial. It needs to be easily accessible but set a safe distance from your home, fences, and tree branches.
Always check local codes and restrictions for exact setback rules from property lines.
Define the zone with a stone border or a paver path. This makes the entire space more inviting and functional.
Also, note the prevailing wind direction. A simple step can keep smoke from drifting toward your house or seating area.
This careful balance of aesthetics and practicality creates a cohesive outdoor environment you’ll love.
Investing in high-quality components ensures your gathering spot remains safe and attractive for years. In fact, 92% of DIYers report high satisfaction with their project after having the right gear on hand.
Your choices here directly impact durability and ease of build.
Precision is key for a stable build. Essential gear includes a level, tape measure, shovel, and a rubber mallet.
A tamping tool for compacting your base also improves the project’s longevity. Having these items ready streamlines the entire process.
| Tool | Purpose | Pro Tip |
|---|---|---|
| Tape Measure | Ensures accurate dimensions and layout. | Measure twice, cut once for perfect fit. |
| Level | Guarantees a flat, even base and walls. | Check level frequently as you build up. |
| Rubber Mallet | Secures blocks or stones without damage. | Use gentle taps to adjust positioning. |
| Tamping Tool | Compacts gravel for a solid foundation. | Work in layers for maximum stability. |
Use heat-resistant materials like fire bricks or a metal ring for the interior. These handle intense temperatures safely.
Avoid river stones or pea gravel inside. They can trap moisture and crack under direct heat.
For the exterior, choose durable options like retaining wall blocks or concrete stone. They stand up to rain, snow, and sun while keeping their good looks.
Quality materials make your feature a reliable centerpiece for every season.
Your backyard gathering spot should bring warmth, not worry. Proper safety practices are essential from day one. They protect your home, guests, and ensure years of trouble-free enjoyment.
Always maintain proper distance from structures and overhead branches. HPC Fire advises 36 inches of side clearance and 84 inches of overhang clearance for units up to 200,000 BTU.
Proper ventilation prevents dangerous gas build-up. It ensures your burner gets consistent, safe airflow. This is a critical requirement for both gas and wood models.
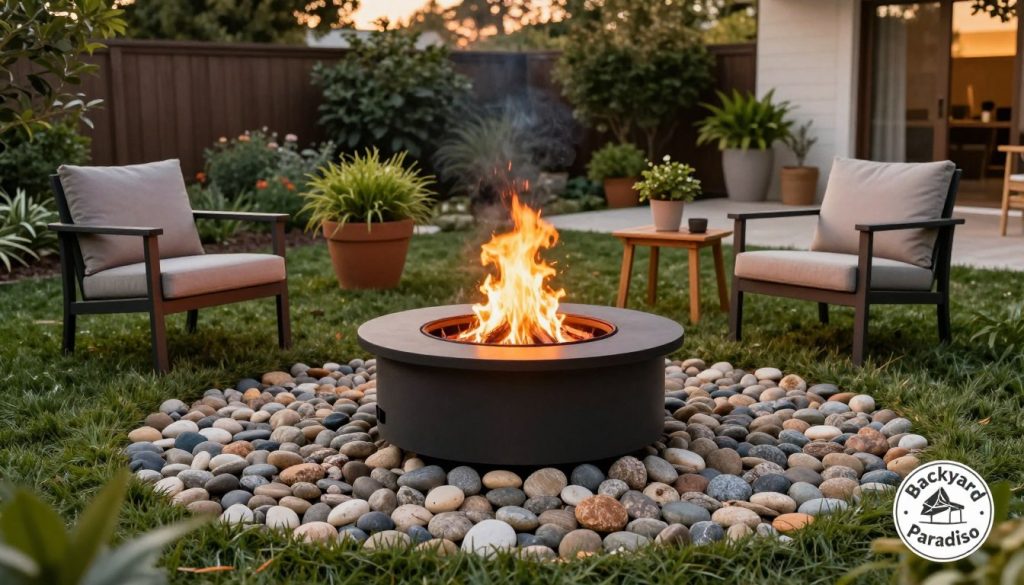
Follow all manufacturer instructions carefully. If using propane, keep the air mixer intake clear. This is essential for proper combustion.
Always have a fire extinguisher or water source nearby. Check your local codes for specific rules about distance from structures. These tips help manage heat and prevent potential hazards.
Setting up a gas model involves specific steps to ensure reliable and safe operation. Your focus shifts to precise connections and system checks.
Linking your unit to the fuel supply demands careful attention. For a natural gas line, hiring a professional is often the wisest choice.
If you proceed, use only gas-rated Teflon tape on all NPT threads. Also, ensure your ignition system is well-protected from the elements.
For propane setups, a CSA-approved regulator is mandatory. Position the entire feature at least 10 feet from any structure for optimal safety.
| Step | Key Action | Why It Matters |
|---|---|---|
| Gas Line Connection | Use correct tape; consider a pro for natural gas. | Prevents leaks and ensures a secure seal. |
| Regulator Check | Verify CSA approval for propane units. | Guarantees proper pressure and safe operation. |
| Clearance Verification | Maintain a 10-foot distance from structures. | Reduces heat-related hazards significantly. |
| Ignition Protection | Shield the spark module from moisture. | Ensures a reliable start every time. |
Before your first light, perform a thorough leak test. Apply soapy water to all connections and watch for bubbles.
For the ignition itself, follow proper start-up steps. If a spark doesn’t catch, wait a full 30 seconds before trying again.
Always check your local codes. Some areas require a shut-off valve within a specific distance of the burner.
Your deck, patio, or concrete slab each present unique challenges for a cozy outdoor feature. The material under your unit directly affects its security and performance.
Thoughtful placement protects your property and ensures everyone’s well-being. Let’s explore the best practices for each common surface.
Wooden decks require extreme caution. You should generally avoid traditional wood-burning models here.
Combustible surfaces need special protection. A propane setup is often a safer choice for deck use.
It doesn’t produce floating embers like a wood one. Always verify the unit is approved for such use by the manufacturer.
For patios and concrete slabs, prevent surface damage. Use a heat shield or fire bricks beneath the feature.
Ensure adequate ventilation to prevent smoke buildup. This maintains proper airflow for the burner, especially with a gas fire model.
Always check with your insurance company. Confirm your setup on a deck or concrete patio is covered by your policy.
| Surface | Key Consideration | Pro Tip |
|---|---|---|
| Deck | High risk with combustible materials. | Choose a propane unit and use a certified heat pad. |
| Patio | Heat can damage paving materials. | Place a thermal barrier like fire bricks underneath. |
| Concrete | Durable but can still crack from intense heat. | Ensure a level, stable base and proper safety clearance on all sides. |
Getting the ground ready might seem simple, but it’s where most mistakes occur. In fact, 65% of errors happen during the leveling phase. A tilted flame or shifting unit often starts here.
Your goal is a perfectly flat and solid foundation. This supports your entire structure for years.
Start by clearing all grass, roots, and debris. Dig down about 4 to 6 inches. This creates space for your base materials.
Next, use a tamping tool to compact the soil firmly. A solid sub-base prevents future sinking. This step is non-negotiable for stability.
Add a 2 to 3-inch layer of crushed gravel. This allows for excellent drainage. It stops water from pooling under your enclosure.
Whether using individual stones, pavers, or a pre-fab kit, check for level constantly. A perfectly flat base ensures your gas fire burner performs correctly. It also keeps connections secure.
| Base Material | Key Action | Primary Benefit |
|---|---|---|
| Gravel | Compact in 2-3 inch layers. | Provides essential drainage and stability. |
| Concrete Pavers | Set on a leveled sand bed. | Creates a flat, durable surface for the unit. |
| Pre-Fab Enclosure | Follow manufacturer leveling guide. | Ensures the kit sits correctly for safe operation. |
This careful preparation is your best safety investment. It guarantees a stable, beautiful backyard feature.
These last details elevate your outdoor centerpiece from functional to fabulous. It’s your chance to add personal style while ensuring everything works safely and efficiently.
Thoughtful choices here make your space more inviting and extend the life of your project.
Consider topping your burner with attractive materials like fire glass or lava rock. These options do more than look pretty.
They help spread heat evenly for better performance. Always keep the ignition ports and air mixer intake clear. Blocking them hurts airflow.
Popular media choices include:
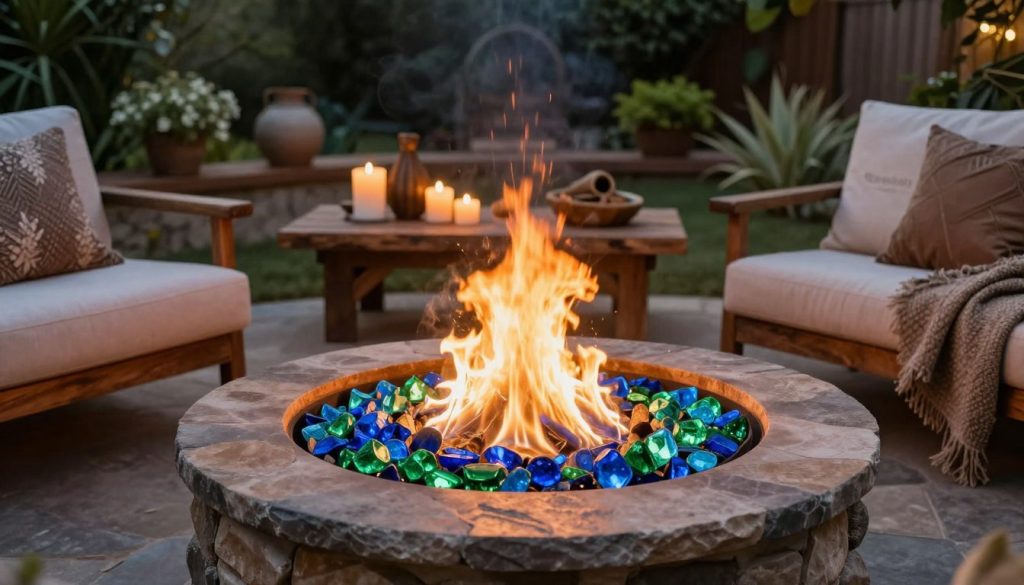
Regularly clear out debris like leaves. This keeps the flame consistent and safe for everyone.
A well-built enclosure gives your area a polished look. Use materials like stone or concrete for the border.
This also maintains the required safety clearance of several inches from the flames. Take time to arrange seating thoughtfully.
Create a cozy circle that encourages conversation. For propane units, ensure your decorative media doesn’t cover the air mixer. Proper ventilation is vital for clean gas fire combustion.
These final steps ensure your fire pits are both beautiful and built to last.
A consistent care routine is the secret to keeping your backyard centerpiece beautiful and functional for countless seasons. This simple habit prevents small issues from becoming big problems.
Set aside a little time each month for basic upkeep. Wipe out the burner pan and check all gas connections for tightness.
This regular maintenance is essential for your safety and long-term enjoyment. Inspect all components, like the ignition wires, for wear or corrosion.
Harsh weather can speed up damage. If your unit fails to light, start by checking the spark module battery.
Ensure the wires are free of leaves and debris. For propane models, always shut off the fuel supply before any work.
Keep your decorative media looking fresh. Clean fire glass or lava rock with warm water to remove soot.
By staying proactive, you ensure even flames and prevent excessive smoke. Your well-cared-for feature will provide cozy warmth for every gathering.
Professional insights can transform a simple outdoor feature into a stunning focal point for your property. Applying a few key principles ensures your project is both beautiful and built to last.
These expert tips help you avoid common pitfalls. They turn your vision into a reliable reality.
First, consider size and proportion. Your fire pit should fit comfortably within your space.
A balanced design feels inviting, not overwhelming. Always follow the manufacturer’s instructions precisely for safe operation.
Choose high-quality materials like stone or concrete. They complement your home’s architecture and withstand weather.
Proper planning for airflow and ventilation is a hallmark of a professional setup. It ensures clean gas fire combustion.
When using fire, prioritize safety. Keep an extinguisher handy. Maintain at least 10 feet from structures.
Consider adding features like a glass wind guard. It protects the flame and improves performance.
| Tip | Benefit | Pro Insight |
|---|---|---|
| Scale to Your Area | Creates a balanced, inviting atmosphere. | Avoids a cramped or sparse look in your yard. |
| Follow All Instructions | Guarantees safe, reliable operation. | Prevents warranty issues and potential hazards. |
| Prioritize Material Quality | Enhances durability and aesthetic appeal. | Invests in long-term value for your property. |
| Plan for Airflow | Ensures efficient burning and reduces smoke. | Critical for both propane and wood fire pits. |
By applying these insights, you elevate your fire feature into a functional centerpiece. It adds warmth and value to your outdoor living.
Your backyard gathering spot can evolve into a true reflection of your personal style with thoughtful design upgrades. These optional enhancements add both function and flair to your cozy centerpiece.
Consider a custom stone or concrete enclosure. It can hide gas tanks and offer storage for outdoor accessories.
A fire table is a brilliant alternative. It serves as a dining surface when not in use, blending versatility with warmth.
Built-in seating or decorative surrounds create a luxurious retreat. Always ensure new materials meet safety requirements for your model.
Adding custom lighting enhances ambiance and safety after dark. A professional touch here makes a big difference.
Keep the overall size in mind for a cohesive design. This planning step ensures all features work together.
By exploring these options, you transform a simple feature into a unique outdoor living area. Your fire feature becomes a personalized destination.
You’ve successfully built a centerpiece that will host stories and laughter for years. This rewarding project transforms your backyard into a cozy, welcoming retreat.
By following this guide, you now have the knowledge for a secure and beautiful setup. Your commitment to safety ensures lasting enjoyment, whether you chose a classic wood-burning model or a convenient gas fire pit.
Remember, regular maintenance keeps your new feature in top condition. A little care prevents issues and preserves its beauty.
Your outdoor living area now has a warm, inviting heart. We wish you countless memorable evenings gathered around its gentle glow.
